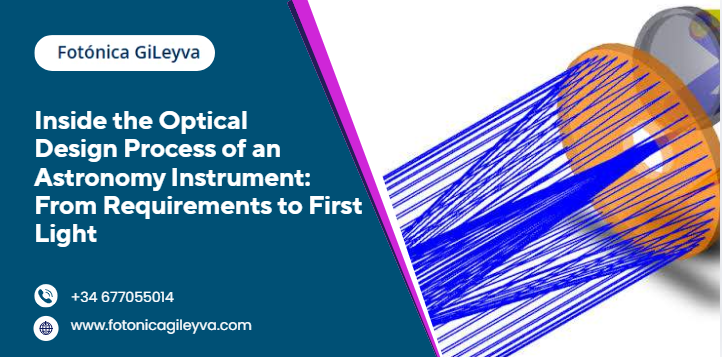
Every breathtaking image of a distant galaxy and every spectrum that reveals the chemistry of an exoplanet atmosphere begins long before a telescope ever points at the sky. It begins on a designer’s screen, where light is traced ray by ray through lenses, mirrors, and gratings that exist only as mathematics. The journey from a scientific idea to a working instrument is one of the most demanding disciplines in engineering, and it is the foundation of every successful astronomy solution optical design — done right, from the very first conversation to the moment the instrument captures its first photons from space.
In this article, we walk through that journey stage by stage. Whether you are a researcher planning a new spectrometer, an engineer joining an instrumentation team, or simply curious about how these remarkable machines come to life, this guide will show you what actually happens between “we need an instrument” and “first light.”
Why Astronomy Instruments Are an Optical Design Challenge Like No Other
Astronomical instruments operate at the edge of what physics allows. The light arriving from a faint galaxy may amount to just a handful of photons per second. There is no second chance to brighten the source, so the instrument itself must waste almost nothing.
This creates a set of constraints that few other fields face simultaneously:
- Extremely low signal levels: Every surface, coating, and alignment tolerance affects how many photons survive the trip to the detector.
- Demanding image quality: Resolving fine structure in a nebula or separating closely spaced spectral lines requires aberration control close to the diffraction limit.
- Harsh and unusual environments: Instruments may operate at cryogenic temperatures, in vacuum, on a vibrating telescope mount, or in orbit where no one can ever service them.
- Long operational lifetimes: A facility instrument is expected to perform for a decade or more without degradation.
Because of these pressures, the design process for astronomical optics is rigorous, iterative, and deeply collaborative. Let us look at how it unfolds.
Stage 1: Translating Science Goals into Optical Requirements
Every instrument starts with a scientific question. Perhaps a research team wants to measure the velocity of stars near the centre of a galaxy, or map water vapour in planetary atmospheres. The first task of the design team is to translate that ambition into measurable engineering language.
This stage produces the requirements document, the contract between science and engineering. Typical requirements include:
- Spectral range and resolution: Which wavelengths must the instrument cover, and how finely must it separate them?
- Field of view and spatial resolution: How much sky must be imaged at once, and at what level of detail?
- Throughput and sensitivity: What fraction of incoming light must reach the detector to achieve the required signal-to-noise ratio in a reasonable exposure time?
- Stability: How much can the image or spectrum drift over an observation lasting hours?
Experienced designers spend significant time challenging and refining these numbers with the science team. A requirement that is slightly too ambitious can double the cost of an instrument, while a poorly worded one can render it useless for its intended purpose. This early dialogue is where projects are won or lost, long before any glass is polished.
Stage 2: Conceptual Design and Architecture Trade Studies
With requirements in hand, the team explores architectures. Should the instrument be a classical spectrograph with a diffraction grating, an imaging system with refractive lenses, or a reflective design built entirely from mirrors? Each path carries trade-offs.
During this phase, designers trade studies comparing candidate concepts against criteria such as:
- Optical performance across the full field and spectral band
- Number and difficulty of optical elements
- Sensitivity to manufacturing and alignment errors
- Thermal behaviour, especially for cryogenic or space-borne systems
- Overall size, mass, and cost
Reflective designs, for example, are free of chromatic aberration and work across very broad spectral ranges, which makes them attractive for multispectral and hyperspectral instruments. Refractive designs can offer compact layouts and excellent correction over modest bandwidths. The right answer depends entirely on the mission.
The conceptual phase ends with a preliminary design review, where the chosen architecture is presented to the customer and independent experts. Only when the concept survives this scrutiny does detailed design begin.
Stage 3: Detailed Optical Design and Optimization
Now the real sculpting of light starts. Using ray-tracing software, the designer builds a precise model of every surface in the system and optimizes curvatures, spacings, glass choices, and tilts to drive aberrations down to the required level.
This is far more than pressing an “optimize” button. A skilled designer guides the software with physical insight, deciding:
- Which aberrations matter most for this application, and which can be tolerated
- Where to place the aperture stop to control off-axis behaviour
- Whether aspheric or freeform surfaces are justified, balancing performance gains against manufacturing cost
- How to manage stray light, ghost reflections, and thermal background, which can silently destroy the sensitivity of an otherwise perfect design
Alongside nominal performance, the designer carries out tolerance analysis. Every lens will be made with small errors, every mount will flex slightly, and temperatures will change. Tolerancing simulates thousands of imperfect versions of the instrument to verify that real-world units will still meet specification. A design that only works when built perfectly is not a design at all.
Stage 4: Optomechanics, Thermal Analysis, and System Integration
Optics never fly alone. Each element needs a mount that holds it to micrometre precision without distorting it, through launch vibrations or telescope slews and across wide temperature swings.
In this stage, the optical model merges with mechanical and thermal engineering:
- Optomechanical design defines mounts, barrels, and structures that maintain alignment under gravity, vibration, and thermal cycling.
- Thermal modelling predicts how temperature gradients shift focus or bend structures, often leading to athermal design strategies where expansion effects cancel out.
- Structural analysis confirms the assembly survives transport, launch loads, or earthquake requirements for ground-based observatories.
The output is a fully integrated instrument model in which optics, mechanics, and thermal behaviour are analysed together. For space instruments, this stage is especially unforgiving: there is no opportunity to refocus a misaligned satellite payload by hand.
Stage 5: Manufacturing, Assembly, and Verification
Once the design is frozen at a critical design review, fabrication begins. Optical workshops grind and polish each element, coating facilities apply the carefully specified thin films, and precision machinists produce the mechanical parts.
Assembly and verification then proceed methodically:
1. Component testing: Every optic is measured interferometrically and compared against its specification before acceptance.
2. Subsystem alignment: Groups of elements are aligned using autocollimators, interferometers, and computer-generated holograms, often to fractions of a wavelength.
3. End-to-end testing: The complete instrument is illuminated with calibrated sources to verify image quality, spectral resolution, throughput, and stray light performance.
4. Environmental qualification: Thermal vacuum chambers, vibration tables, and long stability runs prove the instrument will survive and perform in its operating environment.
This is where the earlier tolerance analysis pays off. When measurements match predictions, the team knows the models were trustworthy. When they do not, the verification campaign reveals it on the ground, where problems can still be fixed.
Stage 6: Commissioning and First Light
Finally comes the moment every instrument builder lives for. The instrument is installed on the telescope or integrated into the spacecraft, and it observes a real astronomical source for the first time. This event, known as first light, is both a celebration and the start of a careful commissioning campaign.
During commissioning, engineers and astronomers work side by side to:
- Fine-tune focus and alignment on real stars
- Calibrate wavelength scales, distortion maps, and detector response
- Verify sensitivity against predictions using standard reference targets
- Characterize any residual effects so the data pipeline can correct them
Only after this campaign is the instrument handed over for routine science operations; from that point on, the quiet months of ray tracing, tolerancing, and testing translate directly into discoveries.
What Separates a Good Instrument from a Great One?
Looking across the whole process, a pattern emerges. Great instruments are not the product of any single brilliant step. They come from disciplined attention at every stage: honest requirements, well-judged architecture trades, optimization guided by experience, tolerancing that respects reality, and verification that leaves nothing to chance. Above all, they come from teams who understand both the science and the engineering, and who can speak both languages fluently.
That combination of depth and breadth is rare, which is why institutions and companies developing new instruments so often partner with specialist optical design consultancies rather than building everything in-house.
Frequently Asked Questions
- How long does it take to design and build an astronomical instrument?
Timelines vary widely with complexity. A compact imaging system may go from requirements to delivery in 12 to 18 months, while a large facility spectrograph or a space-borne payload can take five years or more, including reviews, manufacturing, and environmental qualification.
- What software is used in the optical design process?
Designers typically rely on professional ray-tracing platforms such as Zemax OpticStudio or CODE V for optimization and tolerancing, complemented by stray light tools, thermal and structural analysis software, and custom scripts for end-to-end performance simulation.
- What is the difference between reflective and refractive instrument designs?
Reflective designs use mirrors only, so they are free of chromatic aberration and work across very wide spectral ranges, which suits multispectral and hyperspectral instruments. Refractive designs use lenses, offering compact layouts and excellent correction over narrower bands. Many real instruments combine both in catadioptric configurations.
- Why is tolerance analysis so important?
No optic is manufactured perfectly, and no mount holds position exactly. Tolerance analysis simulates realistic errors across thousands of virtual builds to confirm the instrument will still meet specification once assembled. It protects projects from designs that only work on paper.
- When should a project bring in an optical design consultancy?
As early as possible, ideally during requirements definition. Early expert input prevents over-specified requirements that inflate cost and under-specified ones that compromise science, and it keeps the architecture realistic from the very first trade study.
Partner with Experts Who Have Walked the Full Path!
From the first requirements workshop to the night of first light, building an astronomical instrument is a long and exacting journey. Each stage demands specialist knowledge, and weaknesses anywhere in the chain show up as lost photons, blurred images, or missed science.
If you are planning your next instrument, work with a team that has travelled this road before. Fotónica GiLeyva, a Madrid-based optical consulting and R&D company, delivers exactly that expertise as a trusted provider of astronomy solution optical design. From spectrometers and imaging systems to advanced multispectral and hyperspectral instruments for astronomy and Earth observation, our engineers guide projects through every stage described in this article with precision and care.
Ready to turn your scientific vision into an instrument that performs flawlessly at first light? Get in touch with Fotónica GiLeyva today and let your next discovery begin with world-class optics.